

1) What I Learned Testing Baked Chicken Thighs
Dry chicken thighs are usually not a seasoning problem; they are a timing, moisture, and browning problem. I’m Denise, and my first garlic butter chicken thighs kept coming out with soft skin because I rushed the skillet step and added the butter too early. After testing the sear, oven rack position, and when to add garlic, I discovered that crisp skin starts before the oven ever gets involved. This garlic butter chicken dinner became one of those calm Sunday meals I trust when I want juicy chicken, rich pan sauce, and no guessing at the table.
Table of Contents
- 1) What I Learned Testing Baked Chicken Thighs
- 2) Key Takeaways
- 3) Easy Baked Chicken Thighs (Garlic Butter, Crispy & Juicy) Recipe
- 4) Why Most Baked Chicken Thighs Recipes Fail
- 5) Ingredients for Baked Chicken Thighs (Garlic Butter, Crispy & Juicy)
- 6) How to Make Baked Chicken Thighs (Garlic Butter, Crispy & Juicy)
- 7) Recipe Card: Baked Chicken Thighs (Garlic Butter, Crispy & Juicy)
- 8) Tips for Making Baked Chicken Thighs (Garlic Butter, Crispy & Juicy)
- 9) Common Mistakes & Fixes
- 10) How to Tell Baked Chicken Thighs Are Perfect
- 11) Professional Secrets Behind Better Baked Chicken Thighs
- 12) Best Dishes or Pairings to Serve With Baked Chicken Thighs
- 13) Making Baked Chicken Thighs Ahead of Time
- 14) Storing Leftover Baked Chicken Thighs
- 15) FAQ (Real Cooking Questions)
- 16) Save This Baked Chicken Thighs Recipe
- 17) Conclusion
- 18) Nutrition
2) Key Takeaways
- Dry skin matters before heat does: Patting the chicken thoroughly dry helps the skin sear instead of steam, which is the first step toward crisp baked chicken thighs.
- Butter comes after browning: Adding butter too early can slow browning and burn the garlic, so the chicken skin gets seared first in olive oil.
- Garlic needs only a short bloom: Stirring crushed garlic into melted butter for about 30 seconds gives the sauce aroma without turning it bitter.
- Temperature beats guessing: Bone-in chicken thighs should reach 165°F in the thickest part, and a short rest keeps the juices inside the meat.
3) Easy Baked Chicken Thighs (Garlic Butter, Crispy & Juicy) Recipe
This method works because it treats chicken thighs like a two-stage cook: browning first, gentle oven finishing second. The skillet gives direct contact to the skin, which creates the crisp golden surface that the oven alone often cannot build. Then the oven finishes the meat evenly while the garlic butter sauce gathers all the browned bits from the pan.
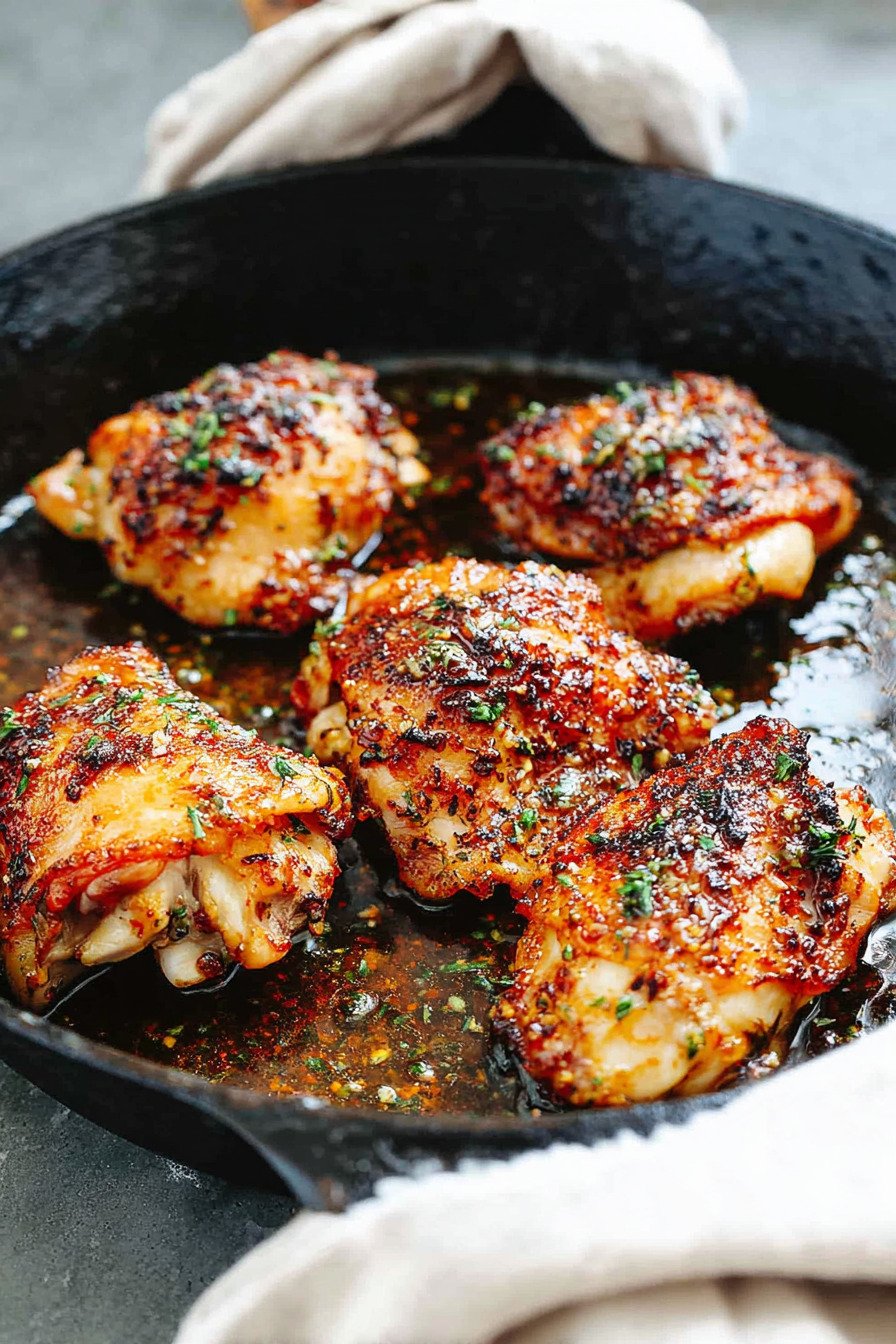
The main goal is contrast: crisp skin, juicy meat, and a buttery garlic sauce that tastes savory without feeling heavy. Bone-in, skin-on thighs are especially forgiving because the bone slows the cook slightly and the skin protects the meat. That gives you a wider success window than boneless skinless chicken, which can dry out much faster.
For anyone searching for chicken recipes garlic butter style, the most important detail is sequence. Sear the chicken before adding butter. Add garlic only after the butter melts. Bake only until the internal temperature reaches 165°F. Those three checkpoints prevent pale skin, burned garlic, and dry meat.
4) Why Most Baked Chicken Thighs Recipes Fail
Most baked chicken thighs fail because the skin starts too wet. When the surface has moisture, the pan spends its first minutes evaporating water instead of browning protein and fat. The result is pale, rubbery skin. Patting the chicken dry before seasoning gives the skin a better chance to crisp during the first skillet contact.
Another common failure is adding butter too early. Butter contains milk solids that brown quickly and can burn before the chicken skin has time to crisp. Olive oil handles the first sear better, while butter is added later to create flavor after the skin has already developed color.
Garlic can also ruin the pan sauce when it is cooked too long or over direct high heat. Crushed garlic needs only a short stir in melted butter. Once it smells fragrant, the skillet is ready for the oven. If the garlic turns dark brown before baking, the final sauce may taste sharp instead of rich.
Under-seasoning is another quiet problem. Bone-in chicken thighs are thick, so seasoning only the top will not carry enough flavor through the meat. Salt and pepper should touch all sides before searing. The garlic butter sauce adds richness, but it should support well-seasoned chicken rather than trying to fix bland meat afterward.
The final failure is guessing doneness by color alone. Chicken thighs can look browned before they are fully cooked near the bone. A thermometer inserted into the thickest part should read 165°F. That one check protects both safety and texture, especially when cooking different-sized thighs in the same skillet.
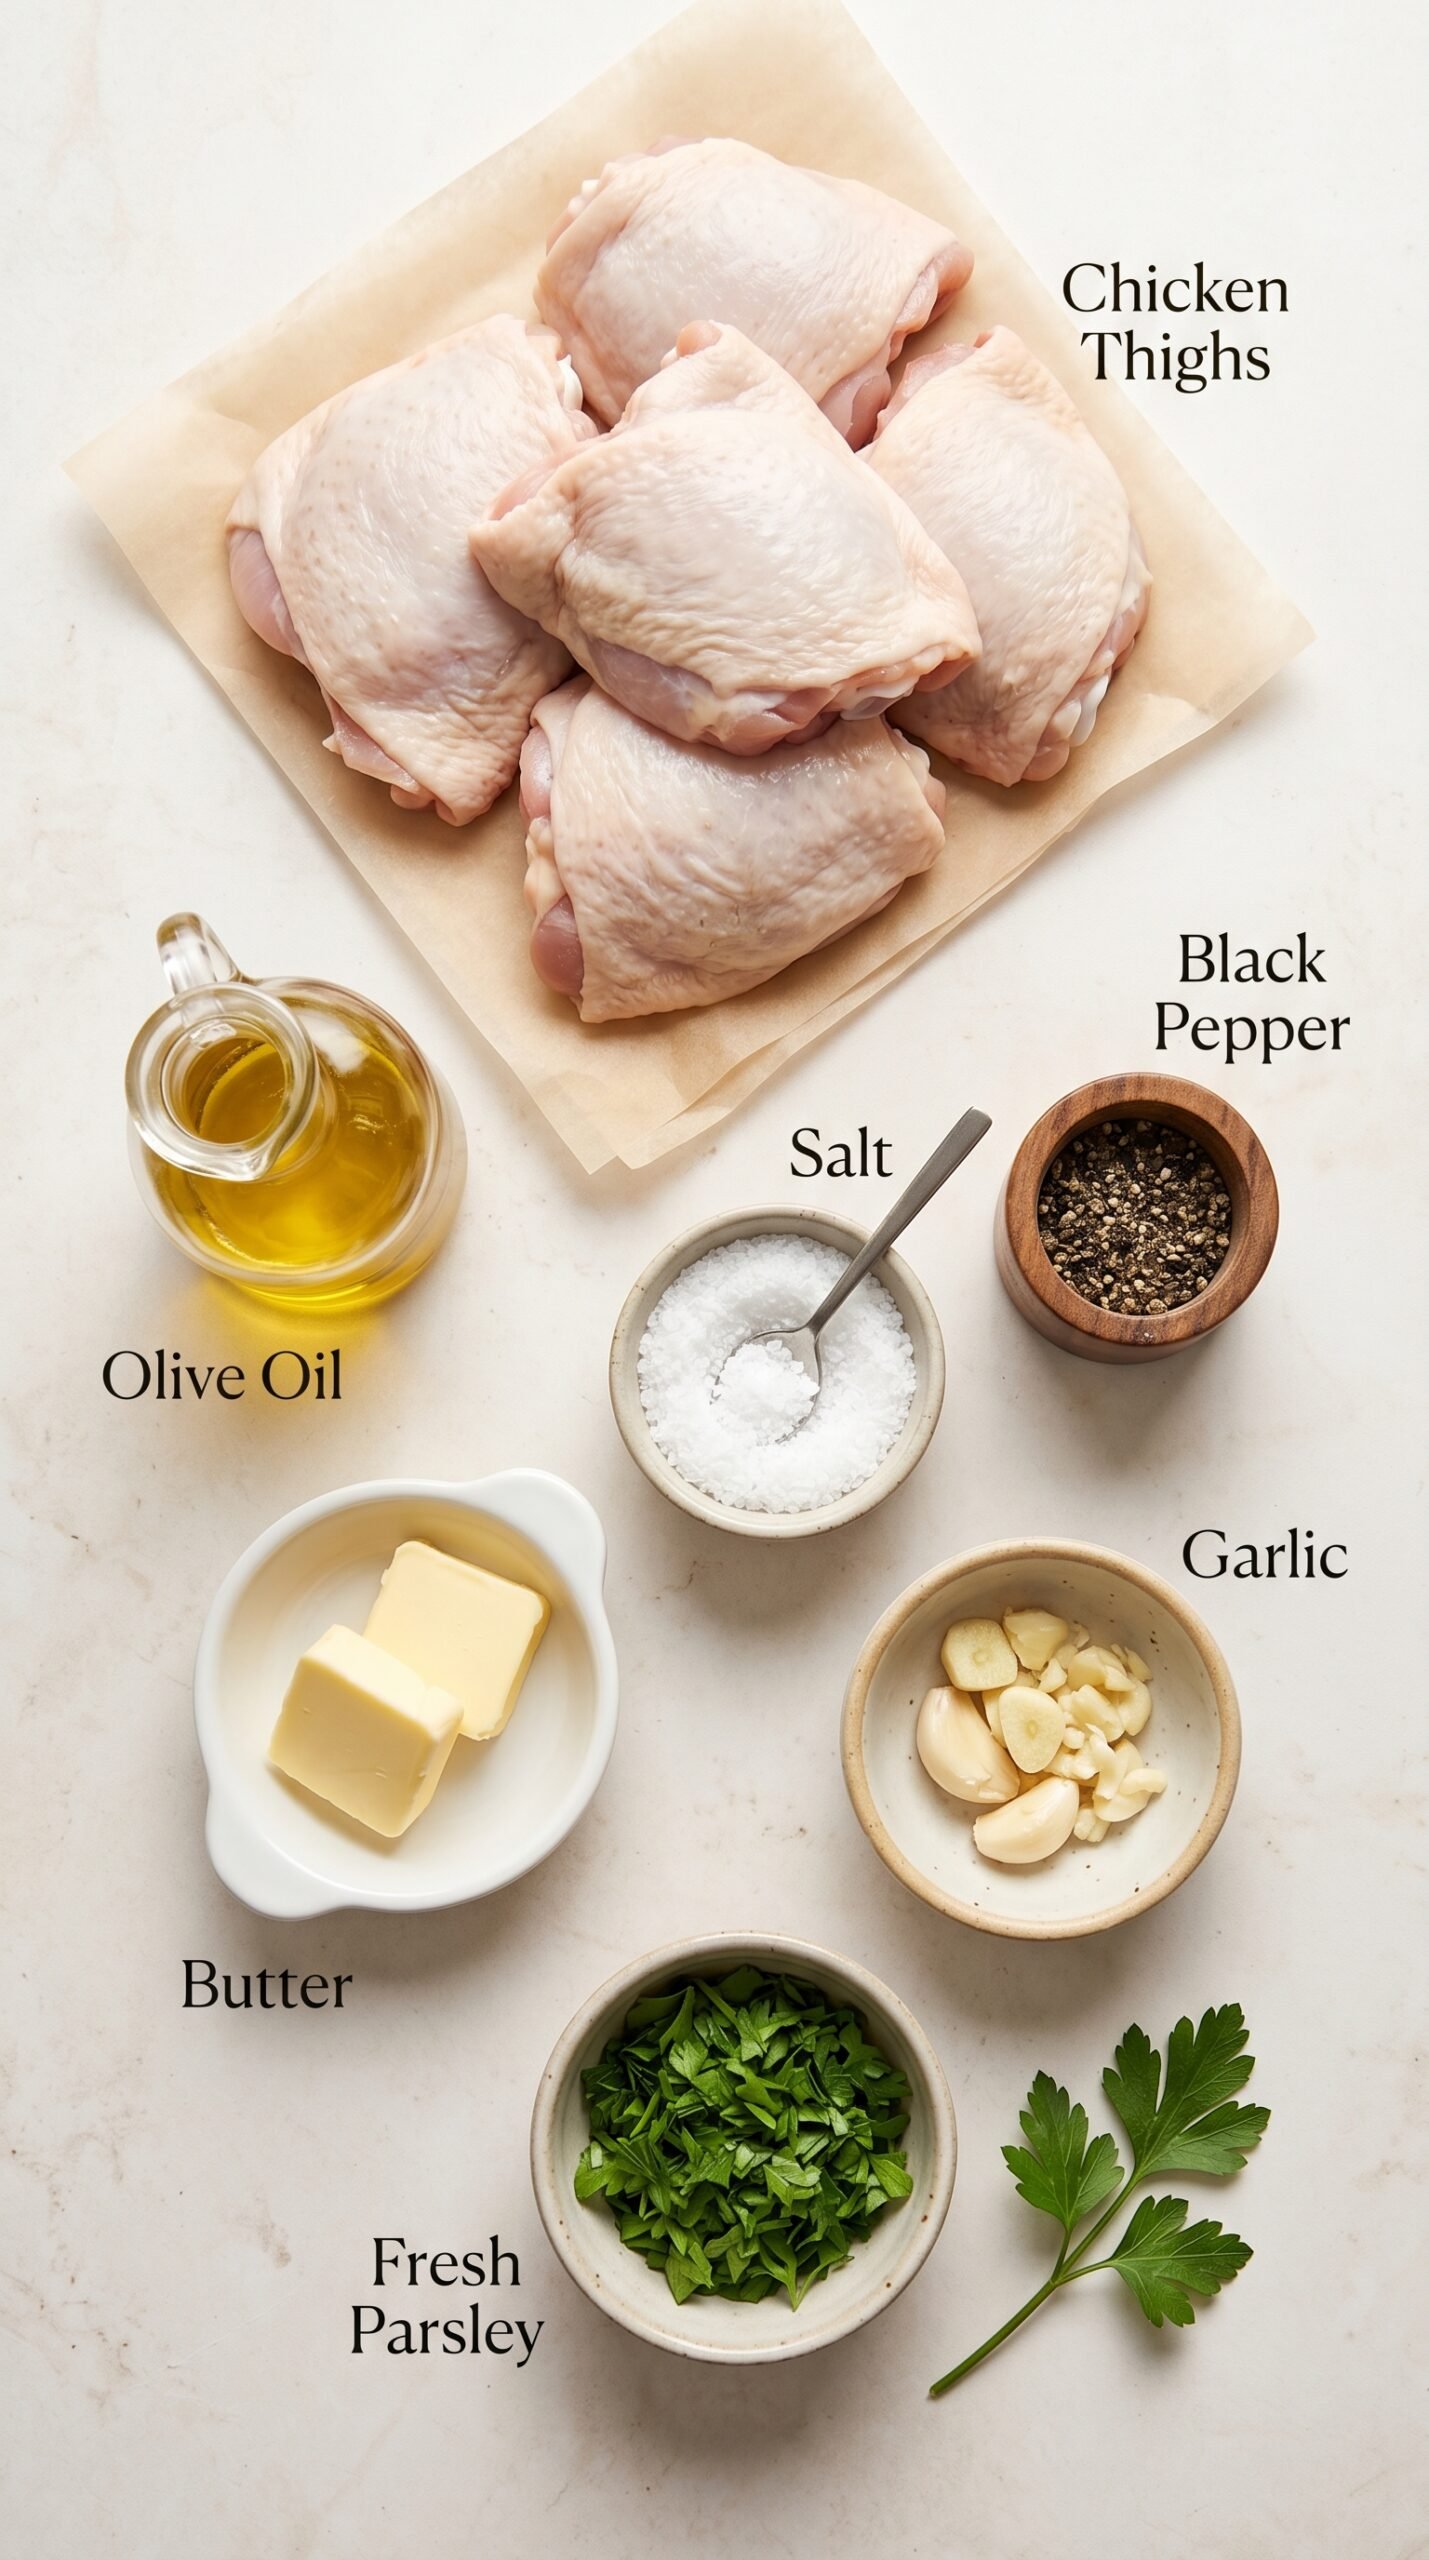
5) Ingredients for Baked Chicken Thighs (Garlic Butter, Crispy & Juicy)
Chicken thighs, skin on and bone in: These are the foundation of the recipe because the skin crisps during searing and the bone helps the meat stay juicy while baking. Use them when you want a richer, more forgiving chicken dinner. If replaced with boneless thighs, the cooking time will be shorter and the texture will be less dramatic.
Salt and black pepper: Salt seasons the meat and helps draw flavor into the surface, while black pepper adds gentle warmth. Season before searing, not after baking, because the seasoning needs time on the chicken. If you season too lightly, the garlic butter sauce may taste rich but the meat underneath can still taste flat.
Olive oil: Olive oil starts the browning process and helps the chicken skin make clean contact with the hot skillet. Use it before the butter because it supports the sear without adding extra milk solids too soon. If you skip it, the skin may stick before enough chicken fat renders.
Butter: Butter turns the browned skillet juices into a glossy garlic sauce. Add it only after the chicken skin is crisp, because butter is better for flavor than for the first hard sear. If you replace it with oil, the sauce will taste lighter but will lose that classic butter and garlic chicken richness.
Crushed garlic: Garlic gives the sauce its deep savory aroma. Add it after the butter melts and stir for about 30 seconds, just until fragrant. If garlic cooks too long, it can become bitter; if it barely warms, it can taste harsh and raw.
Fresh parsley: Parsley is added at the end to brighten the rich butter sauce. Use it after baking so the color stays fresh and the flavor remains clean. If you add it before the oven, it wilts into the sauce and loses its finishing lift.
- Skin-on thighs vs skinless thighs: Skin-on thighs give crisp texture and protect the meat during baking; skinless thighs cook faster but do not create the same golden surface.
- Olive oil vs butter for searing: Olive oil is better for the first browning step, while butter is better for the sauce after the skin is already crisp.
- Crushed garlic vs minced garlic: Crushed garlic spreads flavor quickly through the butter; very finely minced garlic can burn faster if the pan is too hot.
- Cast iron vs thin skillet: Cast iron holds heat steadily and helps the chicken brown evenly; a thin skillet may cool down when the chicken is added.
6) How to Make Baked Chicken Thighs (Garlic Butter, Crispy & Juicy)
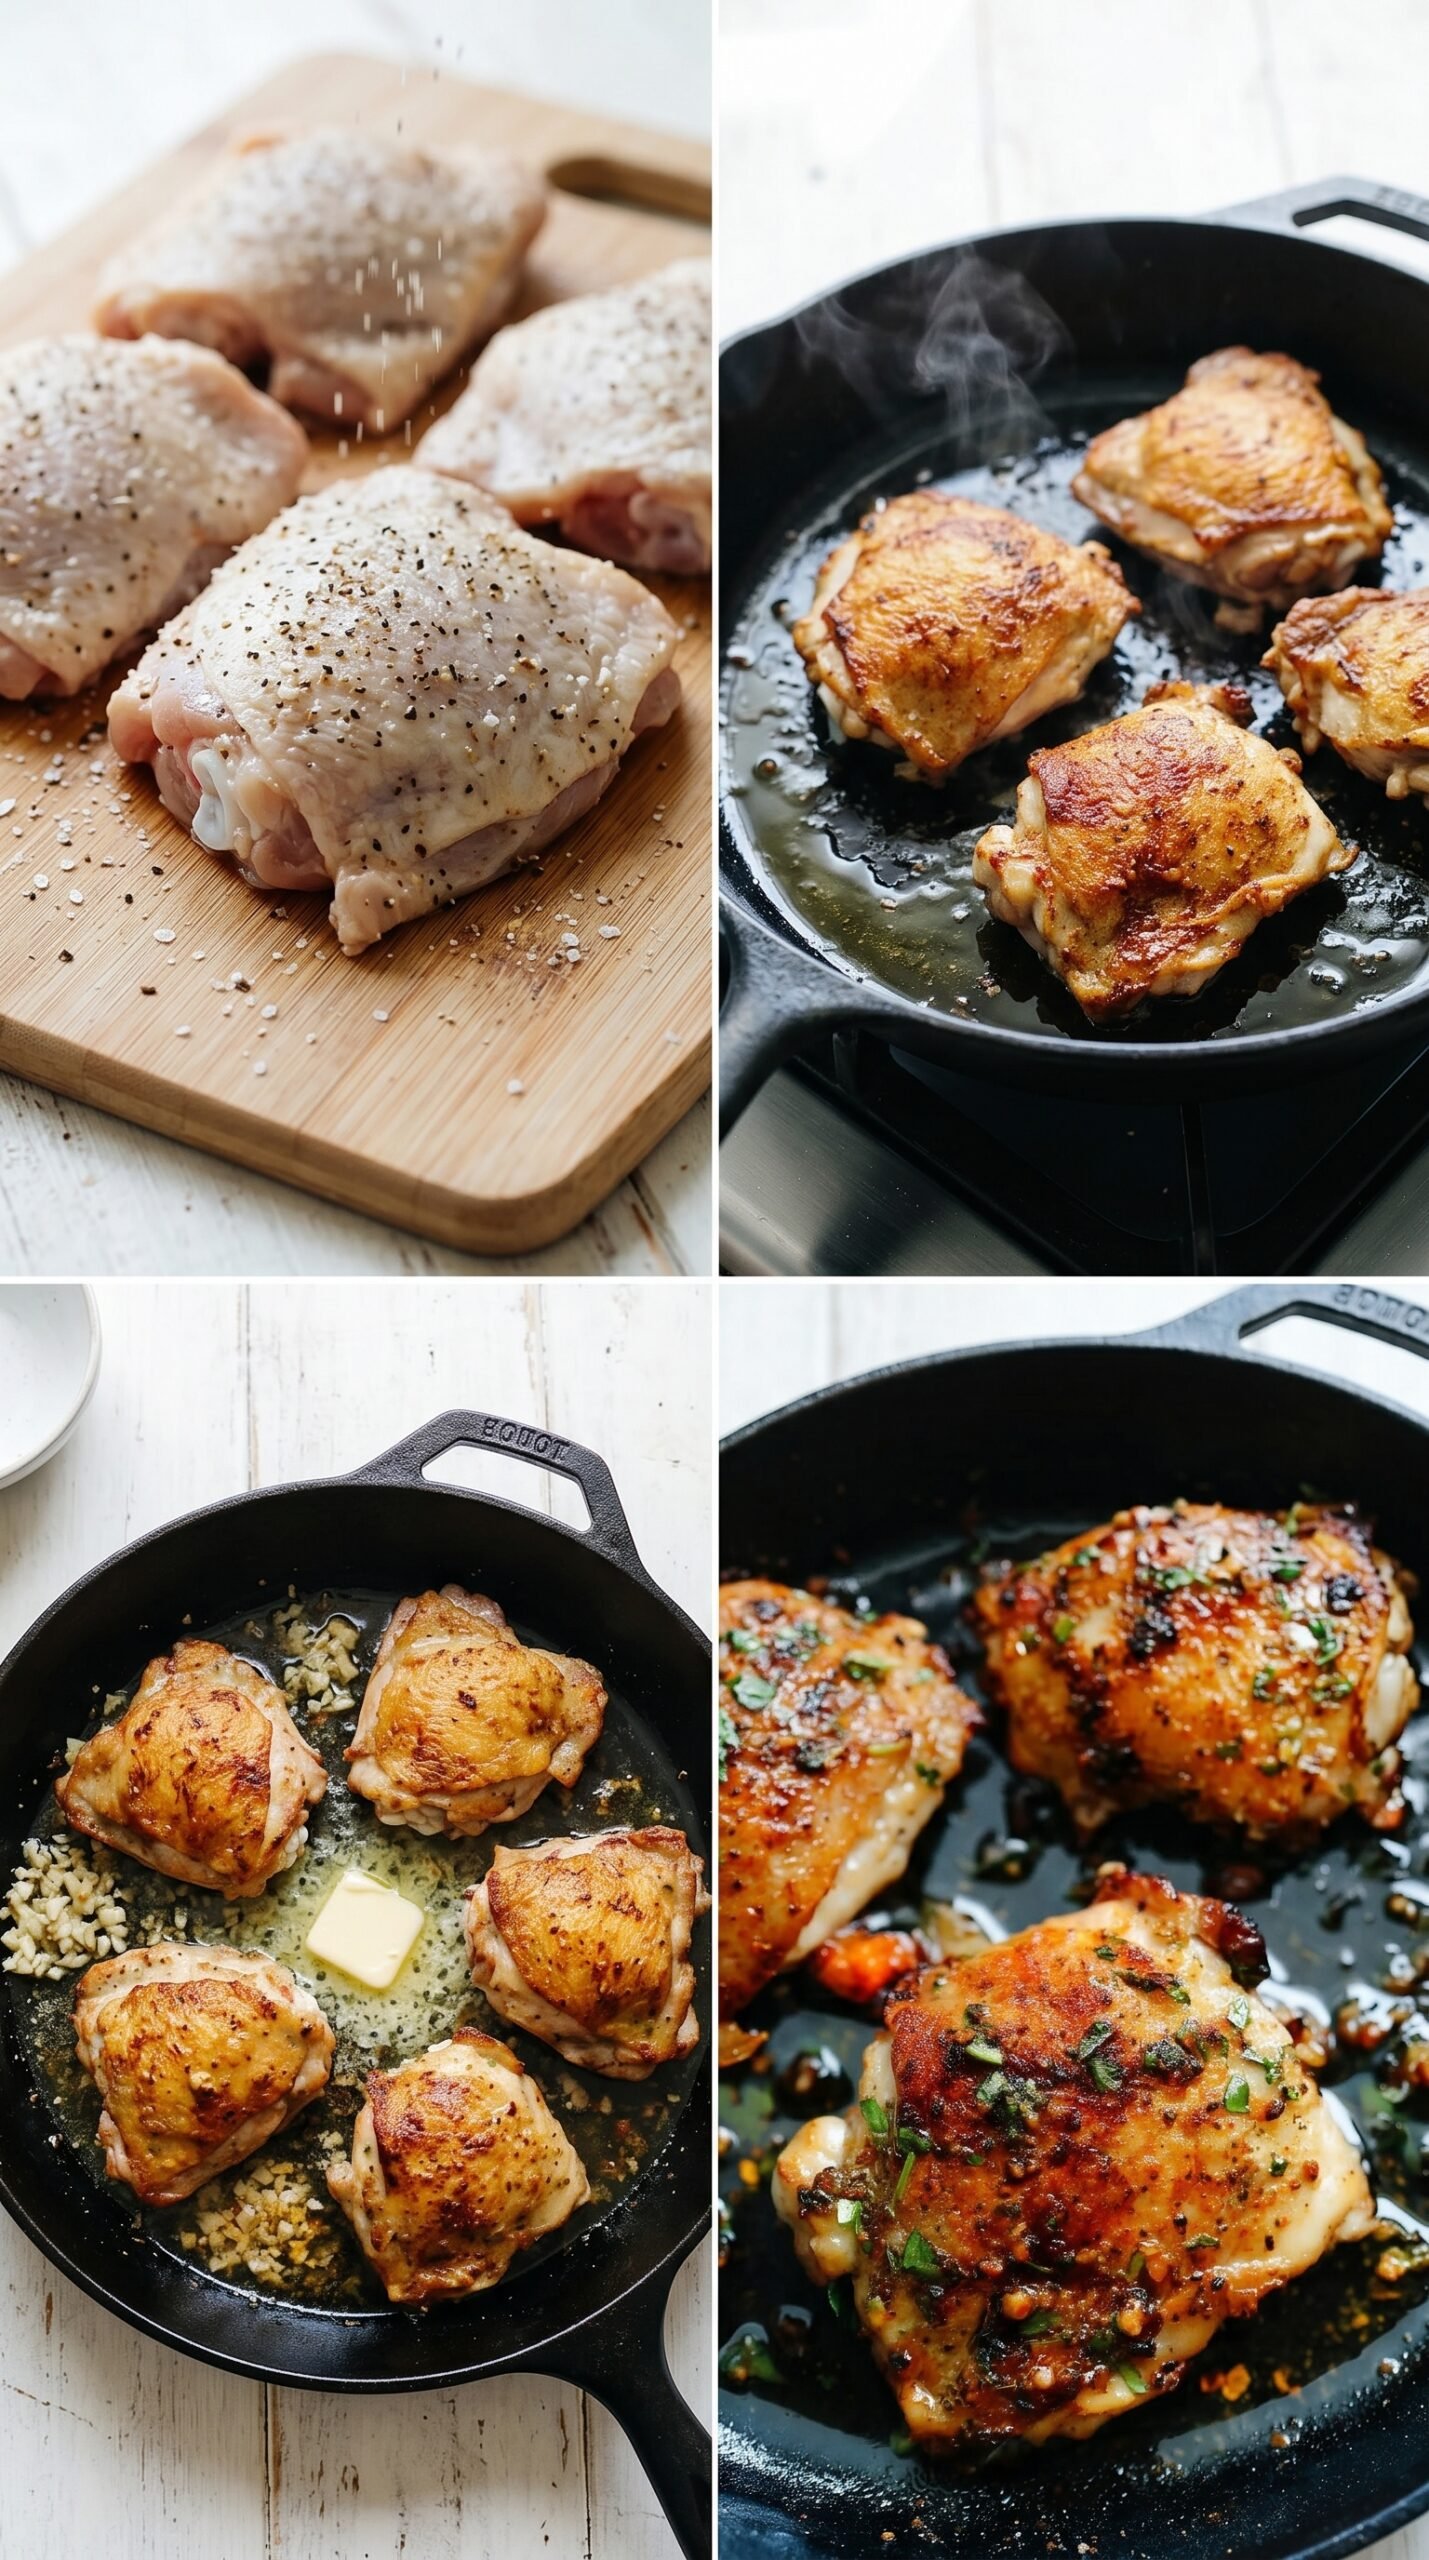
Step 1: Preheat the oven to 400°F and move the oven rack to the center. Pat the chicken thighs dry with paper towels until the skin no longer feels damp, then season all over with salt and black pepper. This is where crisp skin begins.
Step 2: Heat olive oil in a 10-inch cast iron skillet over medium heat. Place the chicken thighs skin-side down and let them sear without constant moving. The skin should turn golden and crisp after about 5 minutes. If it sticks, give it another moment before flipping.
Step 3: Flip the chicken once the skin is crisp. If the thighs release a lot of fat, spoon off the excess carefully. Leaving too much rendered fat in the pan can make the garlic butter sauce greasy instead of glossy.
Step 4: Add the butter to the same skillet. When it melts, stir in the crushed garlic for about 30 seconds. The garlic should smell warm and savory, not toasted dark or sharp.
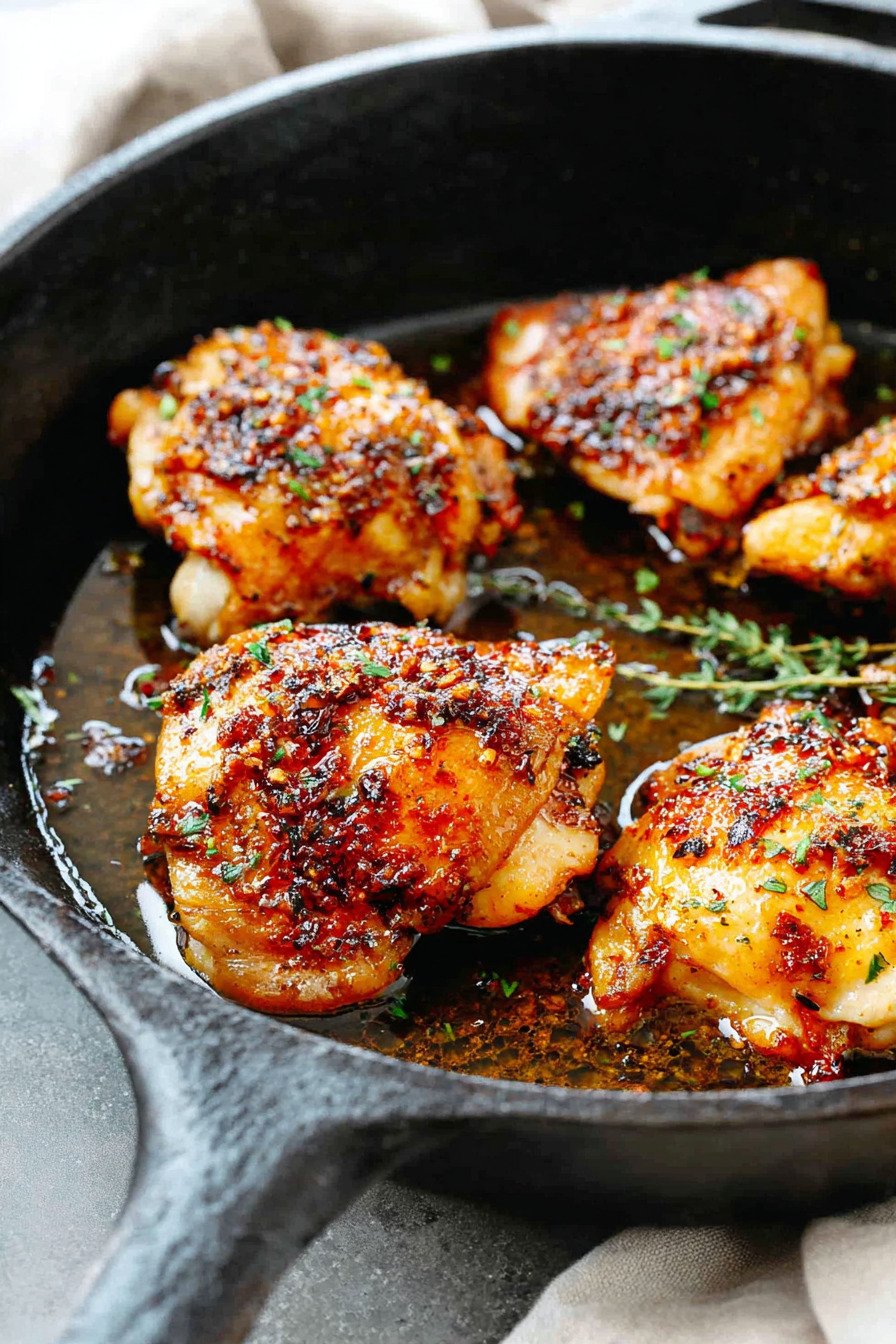
Step 5: Transfer the skillet to the oven and bake for about 30 minutes, or until the thickest part of the chicken reaches 165°F. Spoon the garlic butter sauce over the chicken, top with fresh parsley, and let it rest briefly before serving.
7) Recipe Card: Baked Chicken Thighs (Garlic Butter, Crispy & Juicy)

Baked Chicken Thighs (Garlic Butter, Crispy & Juicy)
Ingredients
- 5 chicken thighs skin on and bone in, patted very dry so the skin can brown properly
- Salt and black pepper to taste, used generously on all sides for balanced seasoning
- 1 tablespoon olive oil, for searing the chicken skin until golden
- 1/4 cup butter, added after searing to create the garlic butter pan sauce
- 5 cloves garlic crushed, stirred briefly so it turns fragrant without burning
- Fresh parsley chopped, for a fresh finish before serving
Instructions
- Preheat the oven to 400°F and move the oven rack to the center position. Pat the chicken thighs very dry with paper towels, then season all over with salt and black pepper. Dry skin is important because surface moisture will steam the chicken instead of helping it crisp.
- Heat the olive oil in a 10-inch cast iron skillet over medium heat. Place the chicken thighs skin-side down and sear until the skin turns golden and crisp, about 5 minutes. Flip the chicken once the skin releases from the pan and looks deeply browned. If the thighs release a lot of fat, carefully spoon off the excess so the butter sauce does not become greasy.
- Add the butter to the same skillet. Once melted, add the crushed garlic and stir it around the pan for about 30 seconds, just until fragrant. Keep the garlic moving so it seasons the butter without scorching.
- Transfer the whole skillet to the oven and bake for about 30 minutes, or until the thickest part of the chicken reaches 165°F. Spoon the garlic butter sauce over each chicken thigh, sprinkle with chopped parsley, and let the chicken rest briefly before serving so the juices settle.
8) Tips for Making Baked Chicken Thighs (Garlic Butter, Crispy & Juicy)
Use chicken thighs that are similar in size so they finish at the same time. If one thigh is much larger than the others, place it toward the center of the skillet where heat is steadier. Smaller pieces near the edge may cook a little faster, so check temperature in more than one piece if needed.
Let the skillet heat before the chicken goes in. A lukewarm pan causes sticking and weak browning. You want the chicken to sizzle when the skin touches the oil, but not smoke aggressively. Medium heat gives the fat time to render while the skin crisps.
Do not crowd the skillet. If the chicken pieces overlap, trapped steam softens the skin. A 10-inch cast iron skillet works for this amount when the thighs fit in a single layer. If your pieces are very large, use a slightly larger oven-safe skillet.
For a quick butter garlic chicken rhythm, set up the butter, garlic, and parsley before the chicken goes into the pan. Once the skin is browned, the sauce step moves quickly. Garlic needs attention, and having everything ready prevents burning while you search for ingredients.
Rest the chicken after baking. Even a short rest gives the juices time to settle back into the meat. Cutting immediately after the oven can make the plate look watery and leave the chicken less juicy.
9) Common Mistakes & Fixes
Problem: The skin is soft instead of crisp. Cause: The chicken was too wet, the pan was not hot enough, or the pieces were crowded. Fix: Pat the thighs dry thoroughly, preheat the skillet, and leave space between pieces so steam can escape.
Problem: The garlic tastes bitter. Cause: Garlic was added before the chicken seared or cooked too long in hot butter. Fix: Add crushed garlic only after the butter melts, stir for about 30 seconds, then move the skillet to the oven.
Problem: The sauce feels greasy. Cause: Too much rendered chicken fat stayed in the skillet before the butter was added. Fix: Spoon off excess fat after searing so the butter sauce tastes rich instead of heavy.
Problem: The chicken looks done but is undercooked near the bone. Cause: Browning happened faster than the interior finished cooking. Fix: Use a thermometer and check the thickest part of the thigh, avoiding the bone, until it reaches 165°F.
Problem: The meat tastes bland even with sauce. Cause: Seasoning was only sprinkled lightly on top. Fix: Season all sides of the chicken before searing so the meat itself tastes balanced, not just the surface.
10) How to Tell Baked Chicken Thighs Are Perfect
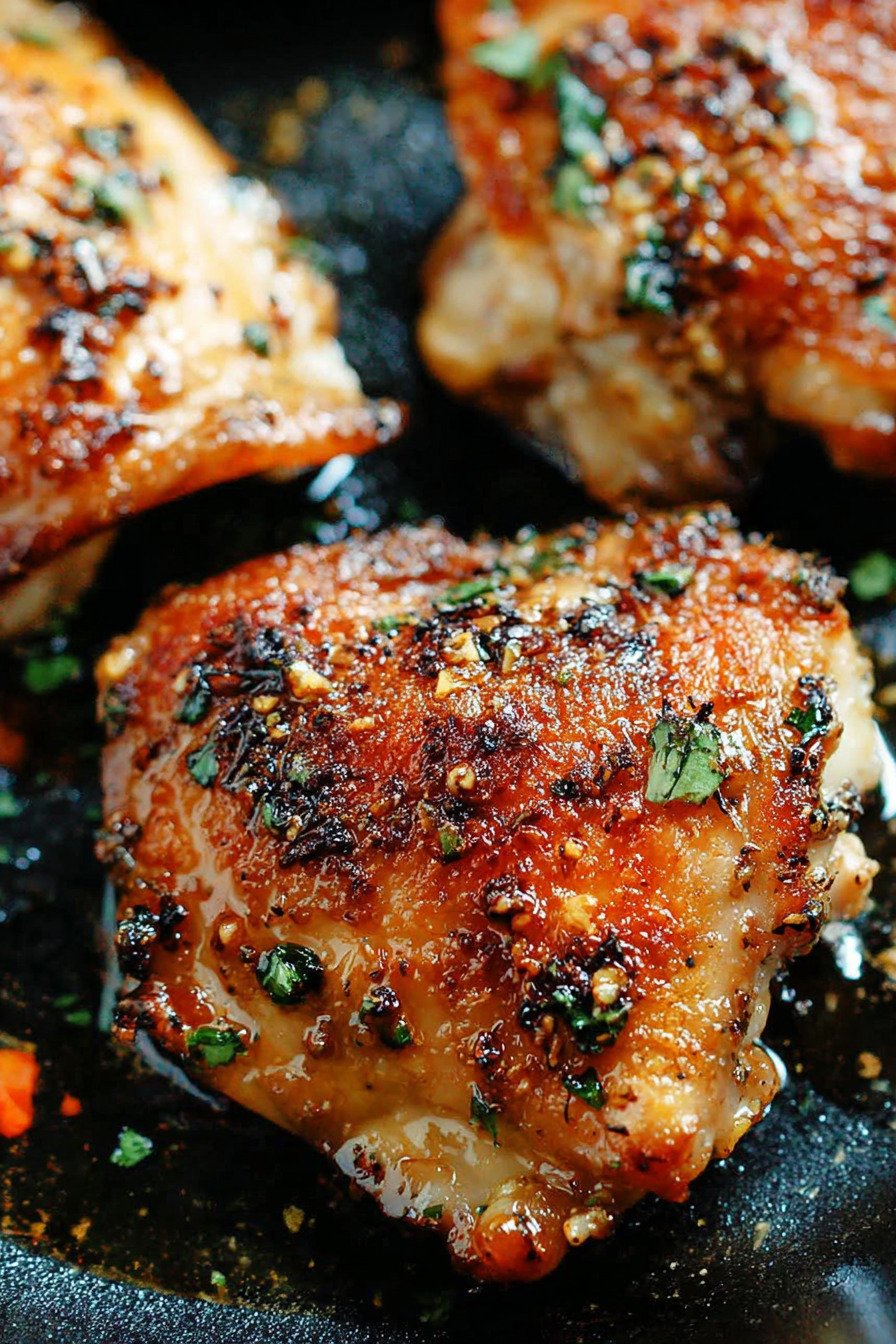
Perfect baked chicken thighs should have skin that looks golden, slightly blistered, and crisp around the edges. The surface should not look pale, rubbery, or wet. When you spoon the garlic butter over the top, the sauce should cling lightly instead of washing the skin into softness.
The meat should feel tender when pierced, but it should not fall apart into shreds. Chicken thighs have more connective tissue than chicken breast, so they can handle oven finishing well, but they still need temperature control. The safe internal temperature is 165°F in the thickest part.
The aroma should be buttery, savory, and garlicky without smelling burnt. If the garlic smells sharp, it may not have bloomed enough. If it smells bitter or smoky, it likely cooked too long before baking. The parsley should add a fresh note at the very end.
On the plate, the garlic butter chicken thighs should release some juices but not sit in a watery puddle. The sauce should look glossy, and the chicken should cut cleanly with juicy meat under the crisp skin.
11) Professional Secrets Behind Better Baked Chicken Thighs
The first professional habit is drying the protein before it touches heat. Browning is slowed by water, so paper towels are not a small detail here; they are part of the cooking technique. A dry surface gives you better color, better texture, and better flavor.
The second secret is letting the chicken skin stay down long enough. Many cooks flip too early because they worry about sticking. In reality, skin often releases more easily once browning has developed. If you force it too soon, you can tear the skin and lose the crispest part of the dish.
The third secret is managing the fat in the skillet. Chicken thighs render their own fat as they cook. That fat tastes good in small amounts, but too much can dull the butter sauce. Spooning off excess before adding butter keeps the sauce balanced.
The final secret is finishing with the sauce, not drowning the chicken in it. Spoon the garlic butter over the thighs after baking so the flavor lands on the meat while the skin still keeps some texture. That is what makes garlic buttered chicken feel rich without becoming soggy.
12) Best Dishes or Pairings to Serve With Baked Chicken Thighs
Baked chicken thighs pair well with sides that can catch the garlic butter sauce. Mashed potatoes, steamed rice, roasted potatoes, or buttered noodles all work because they absorb the savory pan juices without competing with the chicken.
For a lighter plate, serve the chicken with roasted broccoli, green beans, asparagus, or a crisp salad with lemony dressing. The freshness balances the butter and keeps the meal from feeling too heavy.
If you want a comfort-food dinner, add warm bread or dinner rolls for the sauce. If you want a cleaner weeknight plate, pair the chicken with cauliflower rice or a simple cucumber salad. The garlic butter is bold enough that the sides can stay simple.

13) Making Baked Chicken Thighs Ahead of Time
You can season the chicken earlier in the day and keep it covered in the refrigerator. Before cooking, pat the skin dry again because salt can draw out moisture while the chicken rests. This small second drying step protects the crisp texture.
You can also cook the chicken fully ahead of time, but the skin will soften during refrigeration. To bring back the best texture, reheat the thighs uncovered in a moderate oven instead of microwaving. Spoon a little garlic butter sauce over the meat after reheating, not before, so the skin has a chance to warm and firm up.
For meal prep, store the chicken and any extra sauce together, then pair leftovers with rice bowls, roasted vegetables, or salad. The flavor holds well because garlic butter chicken dinner leftovers stay savory even after chilling.
14) Storing Leftover Baked Chicken Thighs
Store leftover baked chicken thighs in an airtight container in the refrigerator for up to 3 days. Keep the pan sauce with the chicken so the meat has moisture when reheated. If possible, place the thighs skin-side up in the container to reduce how much sauce sits directly on the skin.
For reheating, use a 325°F oven until warmed through. A skillet over low heat also works if you cover it briefly, then uncover it to let the skin dry slightly. The microwave is fastest, but it softens the skin and can make the texture less appealing.
Freezing is possible, but the skin will not return to its original crispness after thawing. If you freeze leftovers, remove the meat from the bone after reheating and use it in rice bowls, wraps, soups, or quick skillet meals where crisp skin is less important.
15) FAQ (Real Cooking Questions)
Can I use boneless chicken thighs? Yes, but the cooking time will be shorter and the texture will be different. Boneless thighs do not need as long in the oven, so start checking early. The skin-on, bone-in version gives the crispiest surface and juiciest result.
Why did my chicken skin stick to the skillet? It may have been moved too soon, or the skillet may not have been hot enough. Let the skin sear until it naturally releases. If you pull too early, the browned layer can tear away from the chicken.
Can I make this as herb garlic skillet chicken? Yes, as an optional variation. Add a small pinch of thyme, rosemary, or Italian parsley to the butter after the garlic blooms. Keep the amount modest so the herbs support the garlic instead of covering it.
How do I keep the garlic from burning? Add it only after the butter melts and stir for about 30 seconds. Garlic should smell fragrant before the skillet goes into the oven. If it turns very dark in the skillet, the sauce can taste bitter.
Is this a quick butter garlic chicken recipe? It is quick for bone-in chicken because the skillet and oven work together. The sear builds texture in minutes, and the oven finishes the thighs evenly while the garlic butter sauce develops around them.
16) Save This Baked Chicken Thighs Recipe
If this Baked Chicken Thighs recipe helped you solve dry meat or soft skin, save it for a cozy dinner when you want rich garlic butter flavor without guesswork. The key reminder is: dry the skin, sear before adding butter, and bake to 165°F.

17) Conclusion
Baked chicken thighs become much more reliable when you understand what each step is doing. Drying the skin prevents steaming. Searing builds crispness. Adding butter and garlic after browning protects the sauce from burning. Baking to temperature keeps the meat juicy instead of leaving doneness to luck.
Once those checkpoints are clear, garlic butter chicken thighs stop feeling like a recipe that depends on timing guesses. You can see the color, smell the garlic at the right moment, check the temperature, and finish with a sauce that makes the whole skillet feel intentional. That is the difference between simply baking chicken and cooking it with confidence.
18) Nutrition
Serving Size 1 portion Calories 430 Sugar 0 g Sodium 360 mg Fat 34 g Saturated Fat 13 g Carbohydrates 1 g Fiber 0 g Protein 29 g Cholesterol 175 mg


Leave a Comment